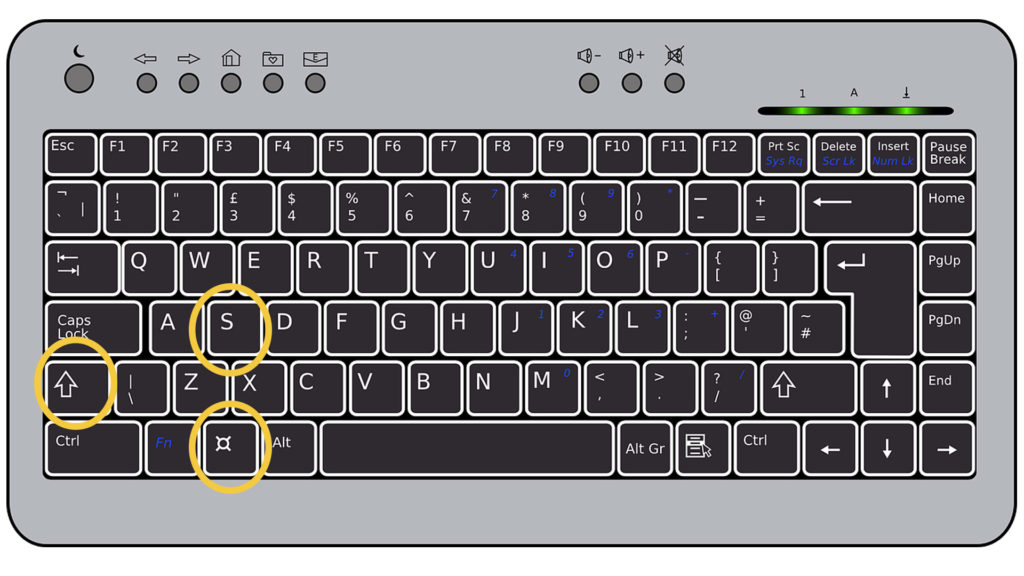
Be it natively or through a software to install, Windows 10 offers several solutions to take screenshots. There is always the possibility of pressing the “Print Screen” key on your keyboard and pasting the result into Paint or any other image processing software, but we would like to offer you here some more complete functionalities to perfectly master this timeless art of Windows 10 screenshot taking.
Windows 10 Screenshot Taking – This is how it works
Making a screenshot in Windows 10 is quick and easy. Here we show you the quickest way.
Press the [Windows] and [Print] keys on your keyboard.
Now you will find a folder called “Screenshots” in your Pictures folder. This is where the screenshot you just made is located.
You can also just press the [Print] key. With the freehand tool you now define the area to be captured. Afterwards you decide what to do with the screenshot. There you can choose between “Save immediately”, “Save as” and “Copy to clipboard”.
When you have copied the screenshot to the clipboard, you can open an image program like Paint and paste it by pressing [CTR] + [V].
Take screenshot in Windows 10: Quick guide
Screenshots are a practical thing. You can use the recordings of the screen to illustrate instructions for operating programs, for example, or to capture error messages. This latter can help the technical support to find the underlying cause. But gamers in particular also like to document their performance in games via screenshot.
Those who want to capture the screen content as a photo and share it with others do not need any complex software. And even there is no need to use the smartphone’s camera. In fact, Windows itself provides the necessary on-board tools for screenshots. For example, these can be created simply by pressing a key combination. However, there are several ways to take a screenshot.
Windows 10: Take a screenshot with Snipping Tool or “Cut and Sketch
As an alternative, you can take a screenshot in Windows 10 using the pre-installed programs Snipping Tool or Cut and Sketch. You can find both programs by first pressing the Windows key and then typing the program name. The following are the most famous tools and apps for Windows 10 screenshot taking.
Snipping Tool
When you have started the program, you can take a screenshot using the simple menu navigation.
Snip and Sketch
It works similarly, but has another handy key combination: With [Windows key] + [Shift] + [S] you can directly mark the area you want to save as an image.
Snipping Tool Plus: Take a screenshot without a keyboard shortcut
When you don’t want to create screenshots with keyboard shortcuts, there are other possibilities. The popular “Snipping Tool Plus” also works under Windows 10. Just download the free tool and unzip the zip file.
Then click on the EXE file that it contains. Within the tool itself, you can then decide whether you want to create a full-screen screenshot, a free section or a right section. Subsequently, you can save the screenshot to your hard drive via the Save icon.
Use browser add-ons: Edit screenshots without Paint
Do you want to screenshot an entire page and not just the area on your screen that is currently displayed to you, a browser add-on is a good alternative.
The following add-ons are available, depending on which browser you use:
For Google Chrome: Awesome Screenshot, FireShot.
For Mozilla Firefox: Aweseome Screenshot Plus, FireShot
Installation of the add-ons is simple, according to which browser you use, you just need to press the “Add” button.
Afterwards, you will find the appropriate tool in the top right corner of your bar. Then click on the add-on and choose which area you want to take screenshot.
These tools have an advantage of taking a picture of your screen where contents like your search bar and your open tabs are not visible
It opens a new tab where you can edit your screenshot. You can alternatively turn to any other image editor once you’ve saved your screenshot to your device.
Also Read:
- Everything You Need to Know About 2020 Expo in Dubai
- 9 Cybersecurity Tips to Improve Online Security and Safety
- How to Use WhatsApp on Web – The Ultimate Guide
- 8 Iconic Products Whose Design Has Changed the World
Microsoft Snip: New tool for screenshots
Similarly, Microsoft itself offers its own screenshot tool for Windows. Download “Microsoft Snip” and install it.
Within the program interface, select “Capture”. You can now click on any window with the crosshairs or create a screen section by holding down the mouse button.
The image will automatically go to the clipboard and can also be saved to the hard drive or shared online.
Do you have any questions regarding Windows 10 screenshot taking? Let us know in the comments section below.
